... to tell you about the lovely green variegated thread I'm using for the edging! It's a size 40, hand-dyed thread by Jess! of Tatlicious. She's got the prettiest colorways - I have several, and it's lovely to work with. Do stop by her shop and browse when you have a minute - she's also on Facebook, for those who have a Facebook account.
Thanks, Jess!, you were absolutely right about the subtle greens working well with the hanky! Can't wait to finish so I can post it!
Sunday, March 31, 2013
Tuesday, March 26, 2013
On the Edge!
It will be, eventually - the edge of a handkerchief, that is! More about that, later...much later.
 What edging should I do? I dithered for months - I'd wake up one day and decide on one, tat a sample, then decide it just wasn't what I wanted. I'd put the edging on hold and work on other projects, then I'd come back to it...still undecided.
David had put away several of my tatting books - in a safe place - and it was extremely safe, as I had no idea where he'd put them. Neither did he! He began a search for them, and after several days, he found them and put them on the bed where he knew I'd notice them when I got home from work! The missing books included all four of my Mary Konior books!
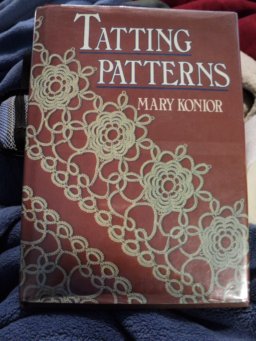
I'm now deeply into the edging - from this book, one of my favorites, by one of my favorite designers - the one, the only - Mary Konior! If you look at the edging closely, you can see that she lifted one of the elements and used it in her "Queen of Hearts" motif (in Tatting With Visual Patterns).
 I LOVE "Queen of Hearts" - I have it memorized and can tat it without the pattern in front of me (and frequently do!). I decided to do this edging - but almost immediately noticed a roadblock: it didn't have a corner!
Hankies have corners; sure, you can tat a couple extra elements and work them around the corner, but with an edging like this, you really need to find a way to tat a real corner. I used the mirror technique: I held a pocket mirror at a 45 degree angle and slid it over the picture of the edging until I saw exactly what I wanted to see - a corner!

Someone, somewhere might want to tat this edging - with a corner - so here is how I did mine:
following the pattern, start the Ring B at the spot where you want to turn the corner. Tat the chains and Rings C and D, then repeat the last chain and Ring D again. Continue with the pattern. You'll have two free picots in the corner element, as opposed to four free picots in each of the side elements.
 What edging should I do? I dithered for months - I'd wake up one day and decide on one, tat a sample, then decide it just wasn't what I wanted. I'd put the edging on hold and work on other projects, then I'd come back to it...still undecided.
 David had put away several of my tatting books - in a safe place - and it was extremely safe, as I had no idea where he'd put them. Neither did he! He began a search for them, and after several days, he found them and put them on the bed where he knew I'd notice them when I got home from work! The missing books included all four of my Mary Konior books!
I'm now deeply into the edging - from this book, one of my favorites, by one of my favorite designers - the one, the only - Mary Konior! If you look at the edging closely, you can see that she lifted one of the elements and used it in her "Queen of Hearts" motif (in Tatting With Visual Patterns).
 I LOVE "Queen of Hearts" - I have it memorized and can tat it without the pattern in front of me (and frequently do!). I decided to do this edging - but almost immediately noticed a roadblock: it didn't have a corner!
Hankies have corners; sure, you can tat a couple extra elements and work them around the corner, but with an edging like this, you really need to find a way to tat a real corner. I used the mirror technique: I held a pocket mirror at a 45 degree angle and slid it over the picture of the edging until I saw exactly what I wanted to see - a corner!

Someone, somewhere might want to tat this edging - with a corner - so here is how I did mine:
following the pattern, start the Ring B at the spot where you want to turn the corner. Tat the chains and Rings C and D, then repeat the last chain and Ring D again. Continue with the pattern. You'll have two free picots in the corner element, as opposed to four free picots in each of the side elements.
Friday, March 8, 2013
Time Off - At Last!
I've had a lovely week - I've been on vacation! It's really been a stay-cation - we've just lounged around the house. I've been busy, though - I worked on my application to teach at Tat Days and finalized the last few patterns!
I'll offer seven patterns to the Tat Days Committee - there is a new angel this year, and a couple of projects which use doodads. I've enjoyed working up the models, and will email the completed application and patterns in the next few hours - please wish me luck!

I made an attempt at tidying up my tatting supplies - I got several new totes at bargain prices and used some of them to corral the various boxes and bags I have for tatting. One of my favorites, the good old plastic pencil box, I found at Big Lots for 88c some time before Tat Days last year - and bought several. The tote holds six with ease, and room for other things as well. It stayed tidy for several hours - at least until my granddaughter visited! Oh, well - no big deal in the scheme of things. Everything's back in place now!
I'll offer seven patterns to the Tat Days Committee - there is a new angel this year, and a couple of projects which use doodads. I've enjoyed working up the models, and will email the completed application and patterns in the next few hours - please wish me luck!

I've also had some time to play - I've started Jon Yusoff's Merriment Doily. I think it's going to need major blocking when it's done. It's all curly! I'm contemplating starting a second project; something small enough to complete fairly quickly (they give you such a sense of accomplishment). I'm thinking maybe a bookmark - what say you?
I made an attempt at tidying up my tatting supplies - I got several new totes at bargain prices and used some of them to corral the various boxes and bags I have for tatting. One of my favorites, the good old plastic pencil box, I found at Big Lots for 88c some time before Tat Days last year - and bought several. The tote holds six with ease, and room for other things as well. It stayed tidy for several hours - at least until my granddaughter visited! Oh, well - no big deal in the scheme of things. Everything's back in place now!
Subscribe to:
Posts (Atom)